Today’s post will be about printing on the Creality Halot-Sky photopolymer 3D printer. Let’s look at what it is capable of, what a liquid photopolymer is and what additional equipment you need to have. As befits traditions, let’s go beyond the usual life and try to print models from burnt jewelry photopolymers. We will also find out what problems there may be with them and how the manufacturer can react to this.
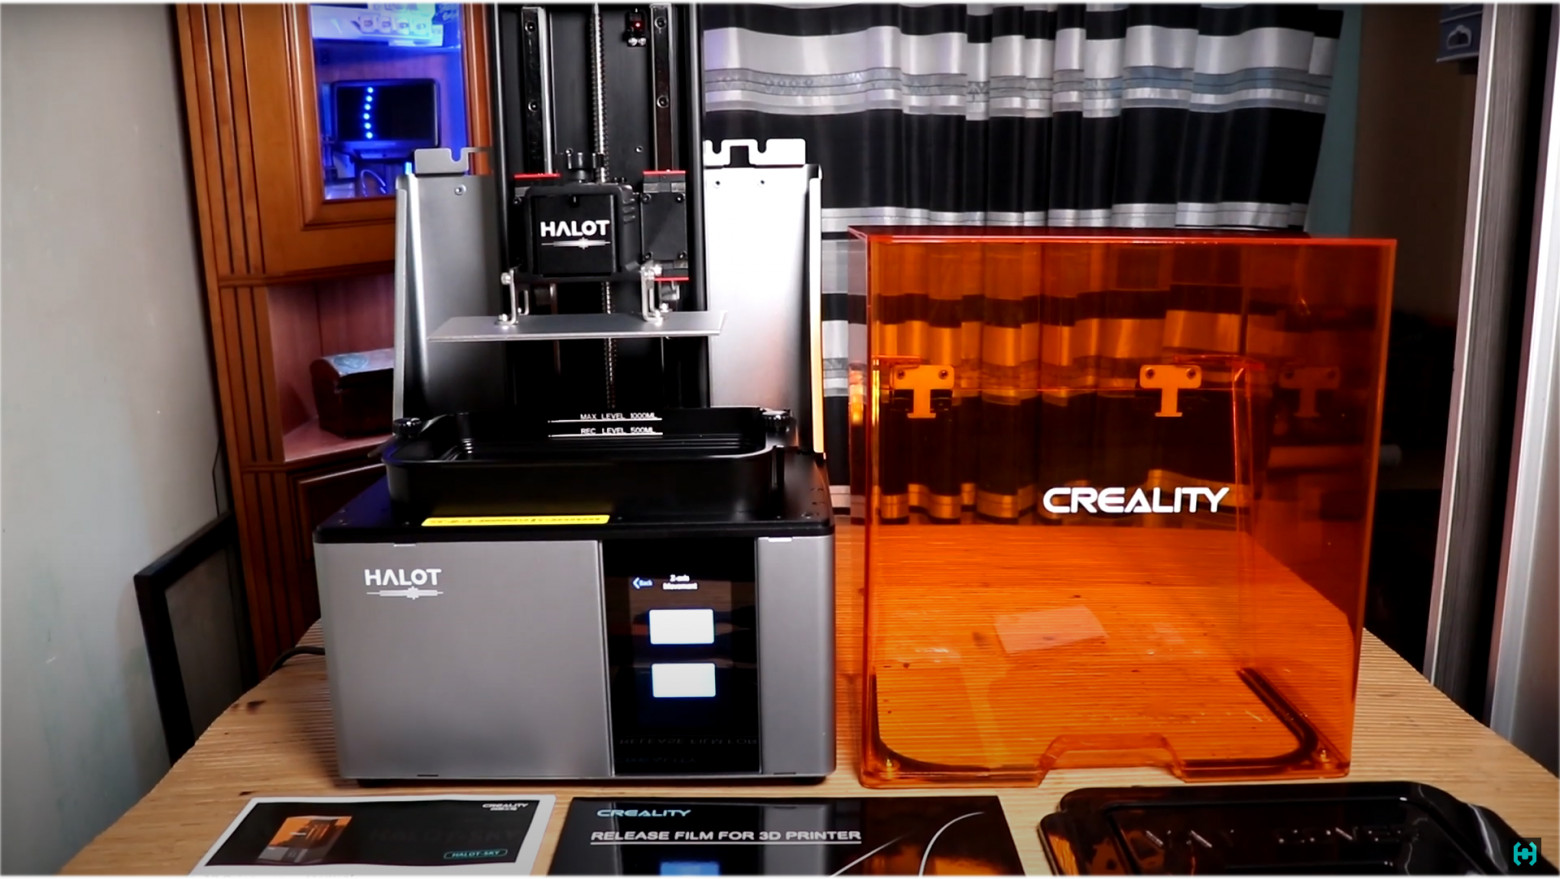
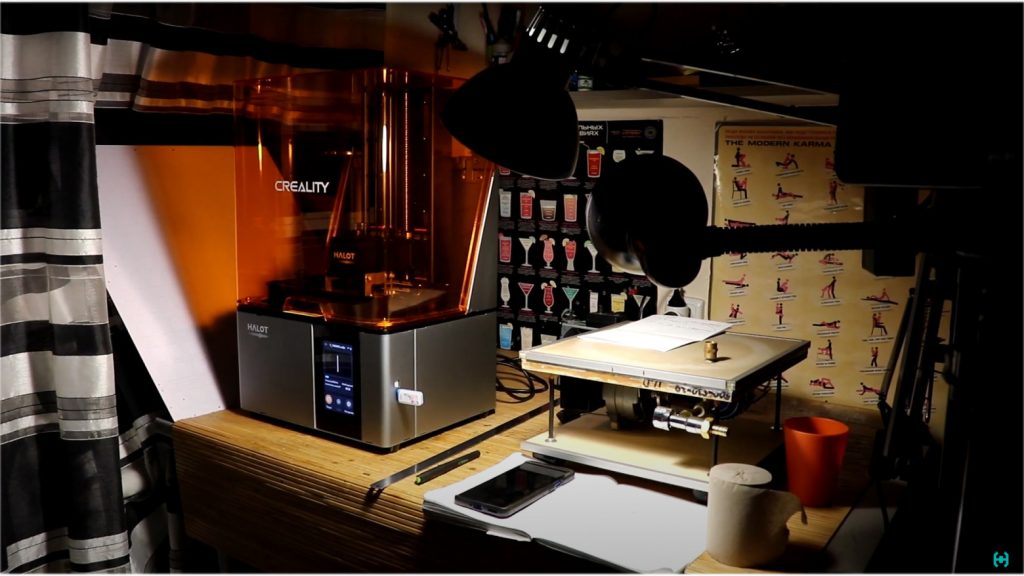
The device consists of a printer body and an orange flip cover that protects the photosensitive polymer resin from ultraviolet rays. The clamshell design saves a lot of working space and clearly visualizes the printing process through transparent windows. From additional inventory there is an instruction, brushes for windows, a spatula for repairing an apartment and every little thing. What is missing in this kit is a jar of photopolymer, I had to buy it separately. Also included is a 16 GB flash drive on which you can store your photos, movies and of course files for printing.
Looking ahead, I will say that the printer only accepts the CXDLP format, specially developed for this by a group of engineers, with the aim of sabotage. We will return to this point.
The instruction here is in all understandable Chinese-English. I usually collect such waste paper by the summer, as the barbecue season is coming soon. Now we are interested in the illustration of how to attach the orange cover. To do this, we find the right tool in the kit and remember in which direction the screws are twisted. Four of them need to be screwed in, and on this the printer assembly can be considered complete. As they say, a minute ago I took out the device from the box.
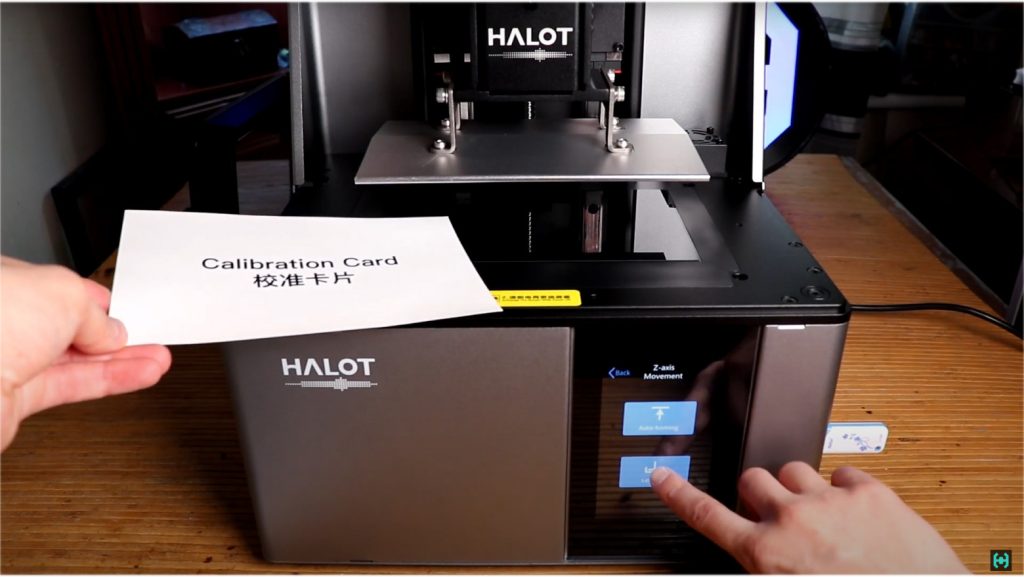
Table calibration is performed once and does not require any further action. To do this, loosen the four screws that secure the platform. This is important, otherwise push the matrix! In the menu we find the Z axis calibration button , press it and put the calibration cardboard directly on the printer matrix. The lead screw will raise the table to the very top to the optical limit switch, and then lower it to the very bottom so that the platform rests under its own weight on the calibration cardboard. At this stage, you need to tighten the four screws and that’s it, the device is ready to print!
Brief technical characteristics of the printer. The model is equipped with an 8.9-inch monochrome 4K screen with a resolution of 3840×2400 pixels and a print build area of 192 * 120 * 200 mm, which allows you to create large-sized products with incredibly high detail. Also, accuracy is achieved thanks to two massive Z -axis guides along which the table moves, which allows you to print models with a layer thickness of up to 10 microns. An interesting feature of the model is a proprietary 120 W light source, which can significantly speed up printing time.
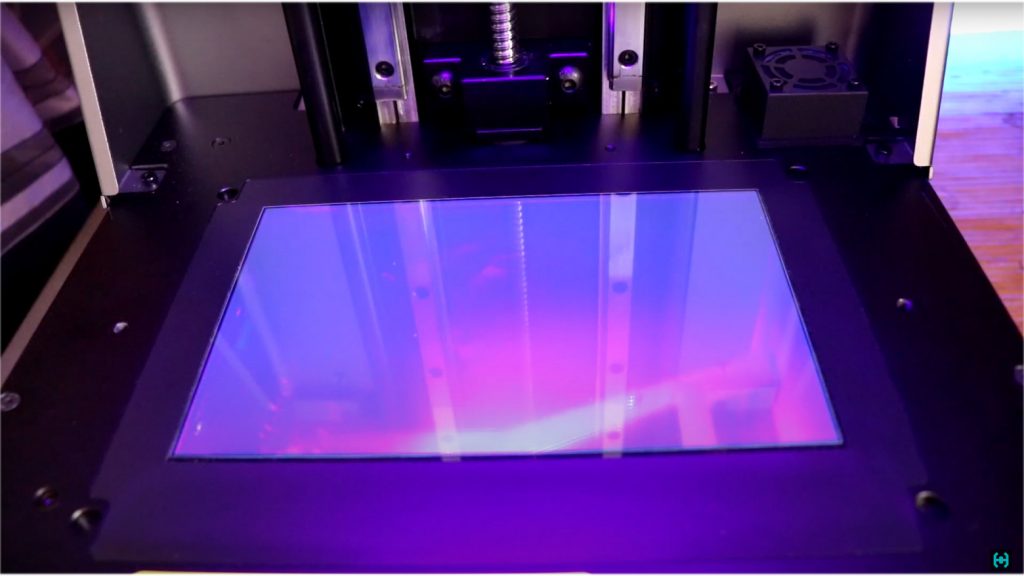
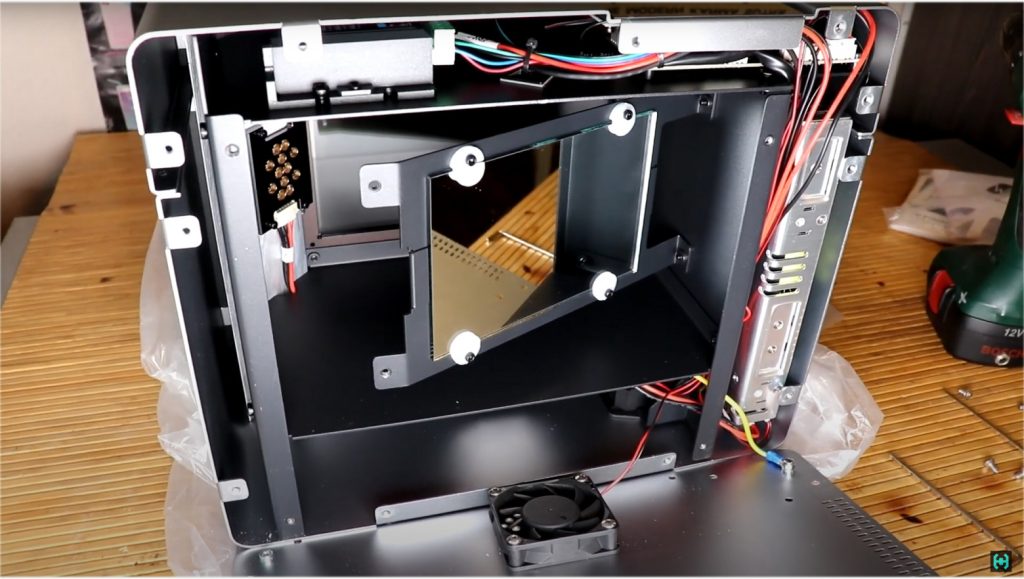
Creality says it has created a new ILS illumination system for the Halot-Sky printer. Its essence lies in the fact that LEDs with a wavelength of 405 nm shine on a mirror that reflects ultraviolet onto a monochrome screen, thereby creating a denser and more uniform light flux with a uniformity of 90%, which has a positive effect on printing. What about the reliability of such illumination? It needs to be improved! One of the four mounts fixing the mirror on the frame turned out to be broken, therefore, during the printing process, the glass resonated in time with the stepper motor and this showed an artifact on the model, resembling parasitic light. Fixed the problem with a soldering iron.
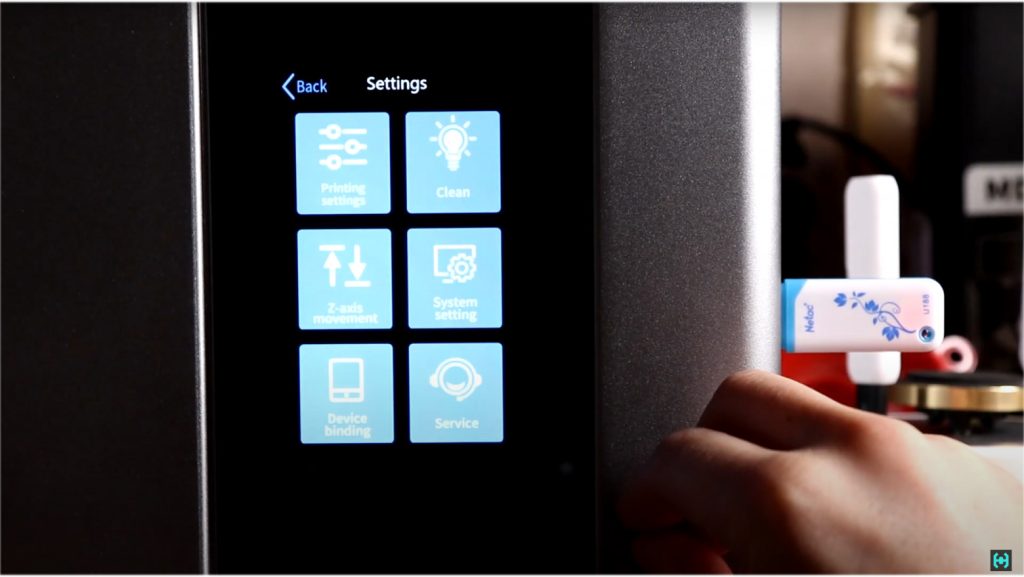
Before starting work on the printer, it is advisable to update the firmware. To do this, go to the Creality website and in the Resin Series section we find the item Halot Os . At the time of shooting, the latest firmware is available for January 21, 2022. Download it to a PC, and then transfer it to the USB flash drive that comes with the kit. We insert it into the printer and in the System settings section we see the Local upgrade item, click it, and then the OK button. After these actions, the Pokémon will dance on the color touch screen. Next, the printer will prompt you to select the language, Wi-Fi network and other pluses.
Also, through the Creality Cloud mobile application, you can observe the printing process or, for example, press the pause button to view the model, and perhaps that’s it. It is impossible to send a model for printing from the phone, since the application does not have a normal slicer for its own line of polymer printers (I think this is temporary). Although, to be honest, all the people I know in the field of polymer printing work only with flash drives. Understood the technical part.
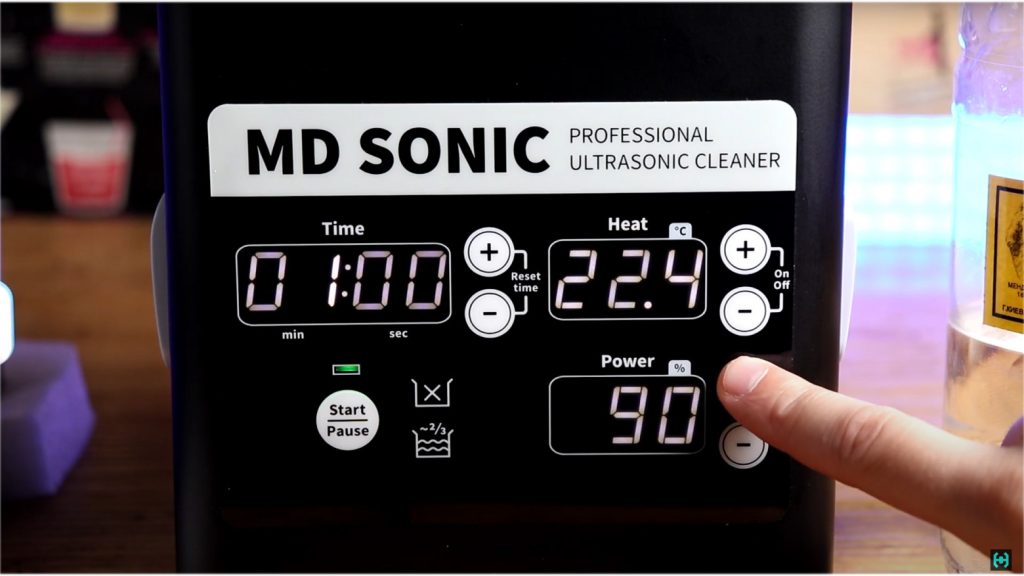
Consider the additional inventory that is needed to work with photopolymer resin. Perhaps the first and most necessary is an ultrasonic bath!
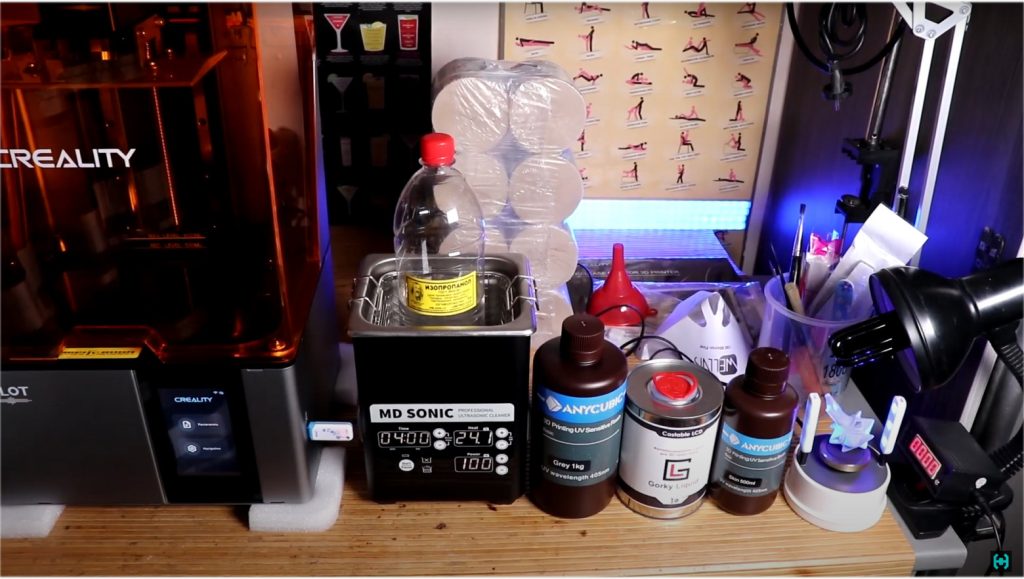
If anyone asks where you can buy one, the answer is – nowhere! This is our own development, which has no analogues today. The emitter power here is 100 W, there is a power adjustment, a timer, heating, a liquid degassing function, touch controls and much more. And I don’t need to write about Chinese anal-ogs, they didn’t even stand next to me.
Why do you need a washer? After printing, liquid polymer resin remains in the pores of the model. If the part is complex, it is quite difficult to remove it with a regular brush, and excess resin can harden over time and ruin the thin elements of the product. The ultrasonic bath eliminates possible defects associated with poor washing. Isopropyl alcohol is used as flushing fluid. Ethyl is a pity to use, it is better to drink it.
We will also need a block of toilet paper, different types of photopolymer resins, brushes, filters, nail files and ultraviolet lamps. The paper must be Obukhov, of the highest quality. And then suddenly, during the press, the stomach will twist …
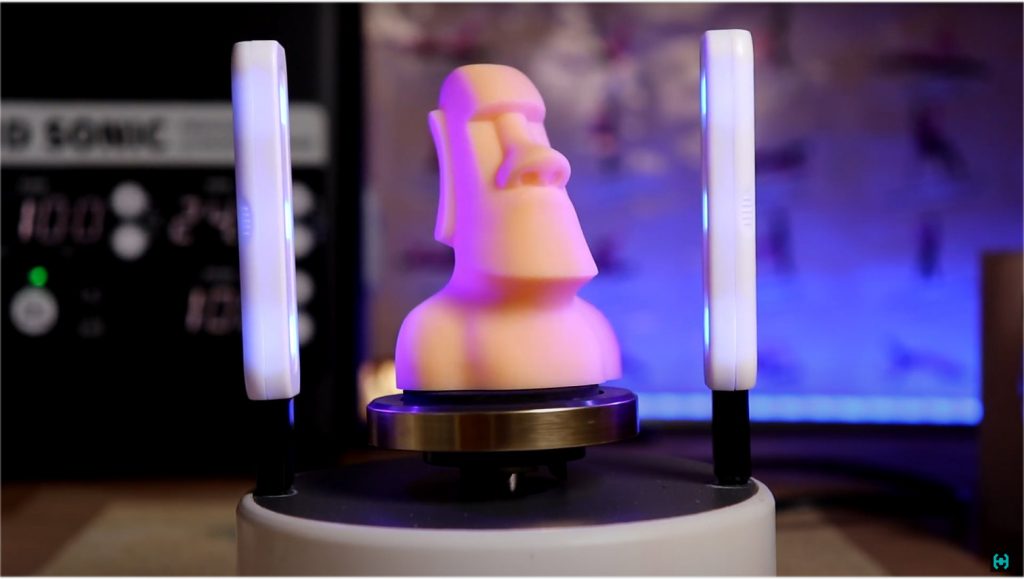
After printing and washing, the model must be cured in UV light. For this, a turntable was made on the basis of an engine from a microwave oven and LED lamps from protective glasses for the phone. The luminous flux must uniformly illuminate the model from all sides, otherwise it may be deformed due to uneven shrinkage of the polymer. You can assemble such a device in a couple of minutes, as you can see from the design, nothing complicated. A simpler solution that does not require any investment is ordinary sunlight.
Before starting work, it is necessary to level the table on which the printer will be located. The Z -axis table must be evenly immersed in the resin, especially when there is little liquid in the tank, which can lead to rejects due to uneven distribution of the liquid in the container.
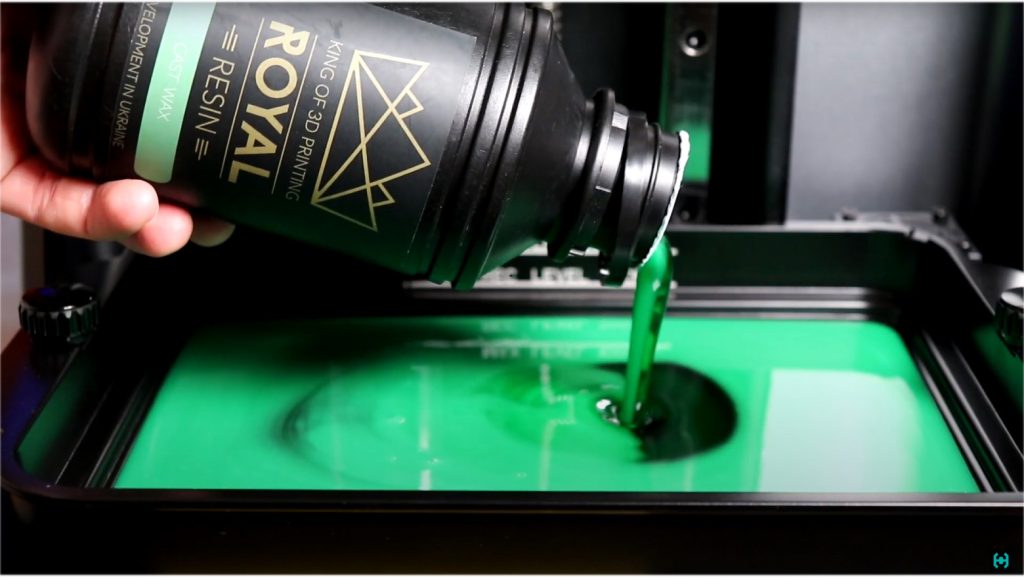
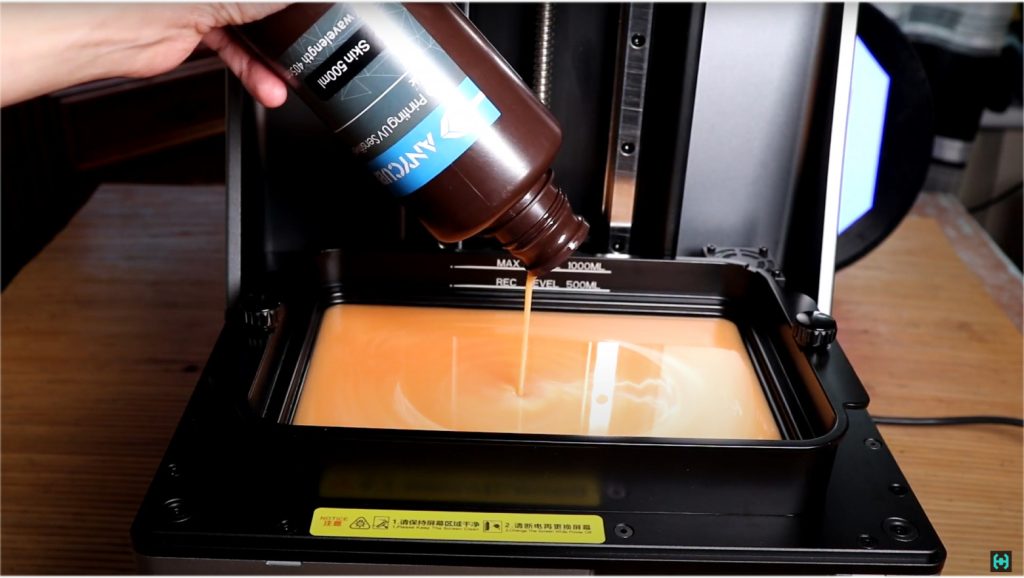
First introduction to printing. At about the same time as the printer arrived, ROYAL RESIN burnout photopolymer was ordered. This little 500 gram jar costs 170 bucks. Expensive, of course, but taking the last coins out of my pocket, I took them to study new 3D printing technologies. In the future, we will pour silver in the end! With my head held high, I tear off the protective film from the bottle and effectively fill the tank of the new printer. Everything would have been fine if not for my luck. In general, you can make a separate issue on this topic, for which you don’t take it, something always goes wrong.
Resin for half a year of stay in the closet slightly exfoliated, but this is normal. It is recommended to shake the polymer before use. In the process of pouring this swamp back into the jar on Teflon FEP film, some particles of dirt caught my eye. They were quite hard to the touch, like salt or sugar. Curious…
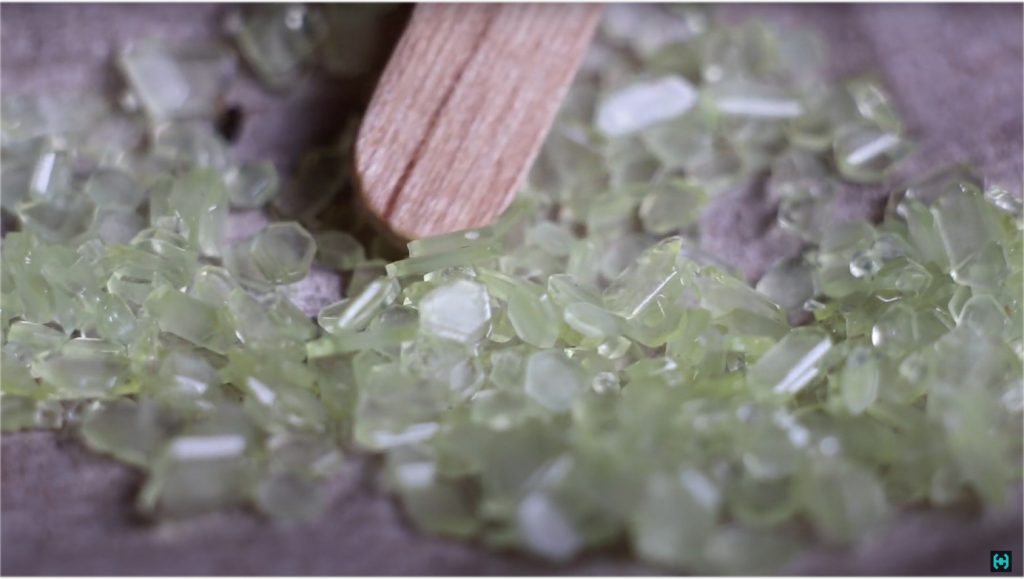
A detailed study of the contents of the filter showed that there are foreign inclusions in the resin. After washing them in alcohol and analyzing the appearance, it turned out that the resin began to crystallize during the six-month exposure. Some crystals had a pronounced hexagonal shape like a snowflake during its formation. The substance tastes tasteless, the gums do not go numb from it. In general, if you put a model on print with such a resin, the Z -axis table will push through the Teflon film with sharp crystals and the expensive polymer will all run away, while the printer matrix will most likely crack and fail.
Having written about this problem to the manufacturer, they shrugged and said that for the first time they see this, they say send it to the bank – we will study it. I immediately refused the proposed option to replace the polymer with another and asked for a refund. And then the circus began. As it should be for any serious company, no one will write to you first, everyone is very busy there. When asked how things are going there, the manager said that less than half of the photopolymer in the received bank was left and the money would be returned for the weight that was left. I was surprised because I transferred resins from the strength of 30 grams. Then, after a couple of hours of calm, a message came that they would return the full amount. And what do you think, such breakfasts lasted three long days until I bothered them with calls. With all this, the feeling did not leave me, as if I had been done some kind of favor. Well, nothing, but now I have magic crystals …
Next I used resin from Anycubic in Skin color. This bank is three years old. During downtime, of course, it exfoliated and before using it, you must definitely shake it up and let it stand for a couple of hours so that all the bubbles come out. Otherwise, you can get soda. So that the resin does not deteriorate from light in between printing, the container is covered with a black lid that comes with the printer.
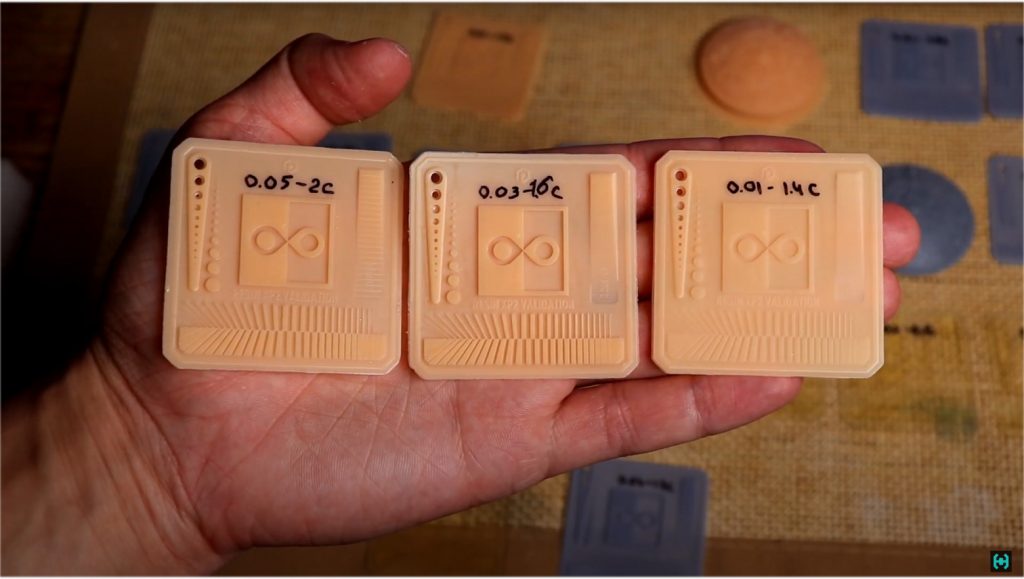
How to determine the required exposure time for a polymer resin. This technique is universal and suitable for each model of photopolymer printer. For this, there is a calibration matrix. Suppose we need a layer height of 50 microns. In the printer settings, set the exposure time for the first couple of layers, for example, 40 seconds, and for the next and most important ones, 2 seconds each. The matrix is thin and it prints in minutes. Next, we wash the calibration square in an ultrasonic bath and see what happened there. I say right away that guessing the exposure time the first time will not work. For each type of resin, even the same manufacturer, it will be different. Therefore, experimentally, we play with the settings until we achieve the best print result. For Anycubic resin in Skin color, the exposure time of the 50 micron layer was 2 seconds, but for the gray resin, the optimal time was 1.7 seconds.
It is important to sign the parameters on the matrix, because it is such a short memory. With a detailed increase, the difference in the layer thickness is clearly visible. It all depends on what detail of the final product we need. Naturally, the smaller the layer, the longer the printing time will be.
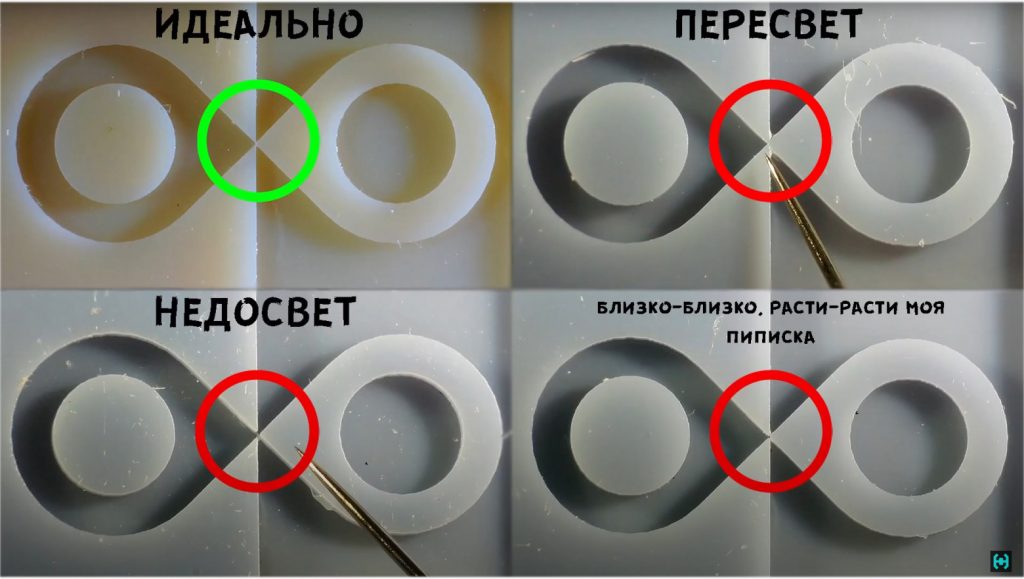
What details do you need to pay attention to. The first is the convergence of the photopolymer mass in the center of the convexity and convexity in the figure in the form of an infinity sign. This is a complex form, and here it is extremely clear where the underlight is, and where the overexposure is. We also look at the ruler, very thin grooves the size of a needle tip will be a little overexposed – this is normal. The baffles come out pixel-sized, which defaults to 50 micron XY-axis. I must say right away that this is an ideal example from which to take an example.
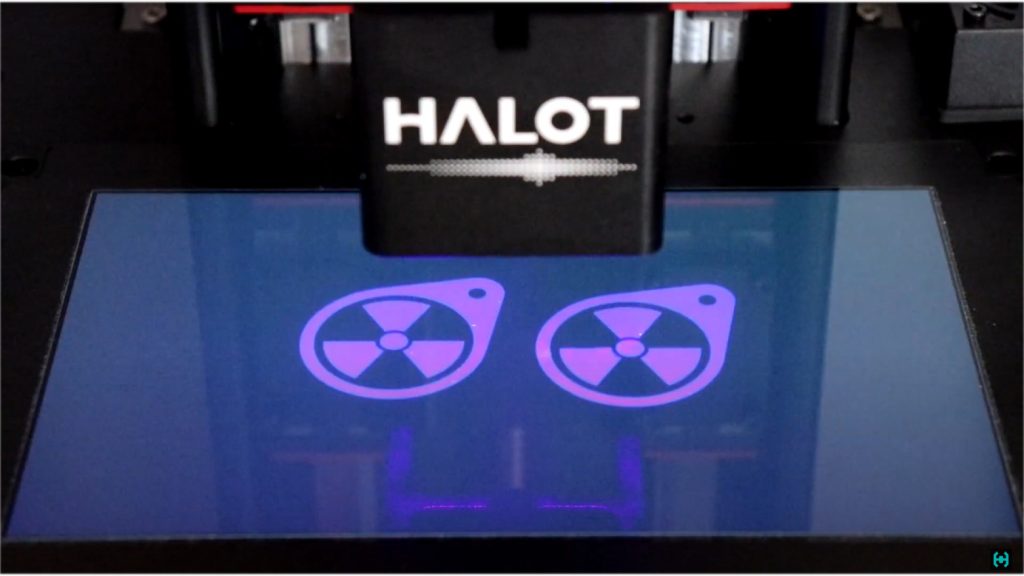
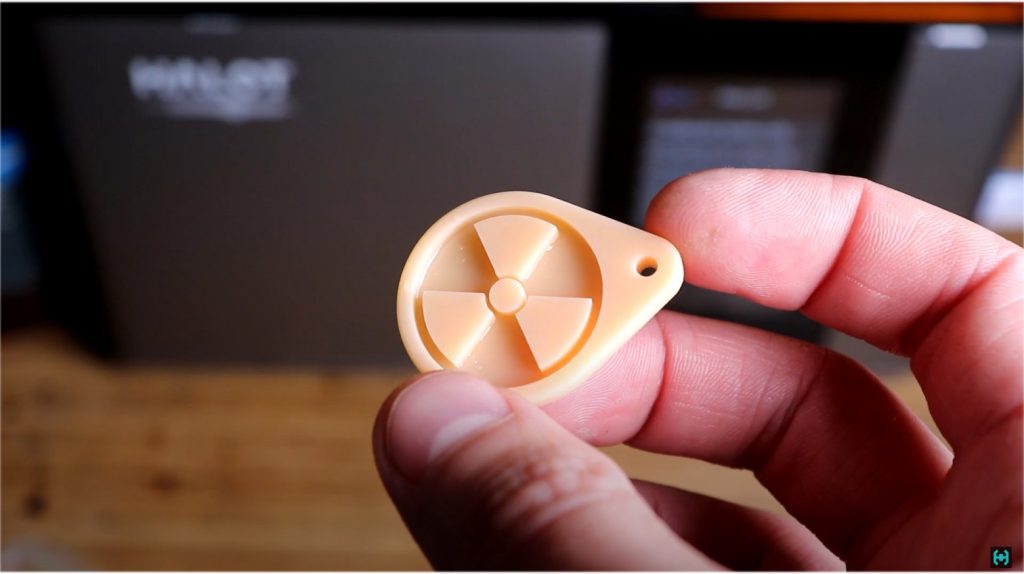
A separate Halot Box slicer has been developed specifically for this printer. It is as simple as the corner of a house with the complex polygonal masonry of the ancient Incas. With simple models, the program works like clockwork. For example, this is a keychain in the form of a radiation sign , downloaded from the Thingiverse resource. In the program, in the print section, click the slicing button. The model will be cut into layers and the file can be saved to a USB flash drive.
As I said before, the print time depends on the thickness of the Z -axis layer . For 50 microns it will be 16 minutes. For another similar model with only a 10 micron layer, the time will increase to 1 hour 11 minutes. Keychain height 3.5 mm. Now you can turn on the mathematics and carry out complex arithmetic calculations for the print time of a layer, for example, 1 cm. Click on the start button and watch the process.
Polymer resin is inherently a very tricky thing. Its polymerization occurs to a greater extent from a wavelength close to 400 nm. The CONVOY flashlight has a wavelength of 365 nm and is designed to check banknotes and search for traces of crimes in the toilet. If radiation is directed at a photopolymer, it will become very hot during polymerization. The same thing happens during the printing process. The maximum temperature that could be recorded during illumination was 60 degrees. The tricky properties of the resin are that the top layer, which has been irradiated, instantly blocks ultraviolet light and does not allow the lower layers to harden. Takes all the brunt, so to speak.
In the meantime, we observe the printing process. Since the polymer, according to some, is extremely toxic, we work in the mask that comes with the kit. It protects the resin from the snot that flows during a cold. Contact with the slurry on the skin is undesirable, it can be absorbed and lead to the most unpredictable consequences.
The print has come to an end. Using a spatula, we tear off the model from the table and wash it in isopropyl alcohol. For such simple products, an ultrasonic bath is not needed. The quality of the model is at the highest level. Those who took this keychain in their hands could not believe that it was printed at home using modern technologies. Other than that, you can see for yourself. We carry out the procedure of ultraviolet irradiation to finally fix the resin.
A little about the adhesion of the photopolymer. The problem with my old Anycubic Photon printer was that its models often came off the table, which in turn led to printing defects. Creality has no problem with this. Models with a large contact area completely refuse to come off. The printer comes with a metal spatula, after unpacking it must be sharpened immediately. Otherwise, it will be difficult to pick out the model.
When printing another test model from the slurry, a marriage was born. When the spacecraft tried to take off, its fragments flew in all directions, some of which landed in the tar. Such meteorites in the volume of slurry are unacceptable. In addition to the fact that you can spoil the model, you can also push the matrix. The mood will be spoiled, and printer maintenance will cost a pretty penny. Therefore, we are not lazy and periodically filter the resin, especially since there are enough filters for the kit.
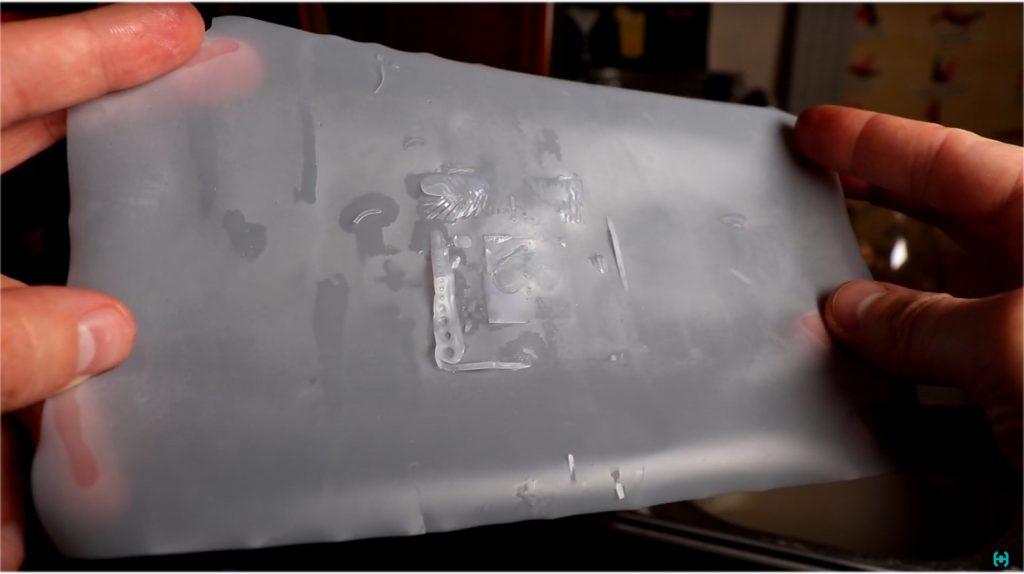
The second way to clean foreign objects is the Cleaning button. It simply lights up the screen and irradiates the entire bottom layer of the photopolymer. When printing calibration matrices, thin partitions located on it can come off and cover the entire Teflon film with bottom sediments. With a spatula, such a hair will not be scraped off. Therefore, we press the Cleaning button for 5-10 seconds, and then remove a thin film from the bottom of the bath.
Visual depilation session. That’s how much garbage came out in the process of printing calibration matrices. If you do not carry out such procedures, then the master of iodine will be dissatisfied because he will grow a beard. In general, we are not lazy and filter the resin in time, and also clean the surface of the FEP film from time to time.
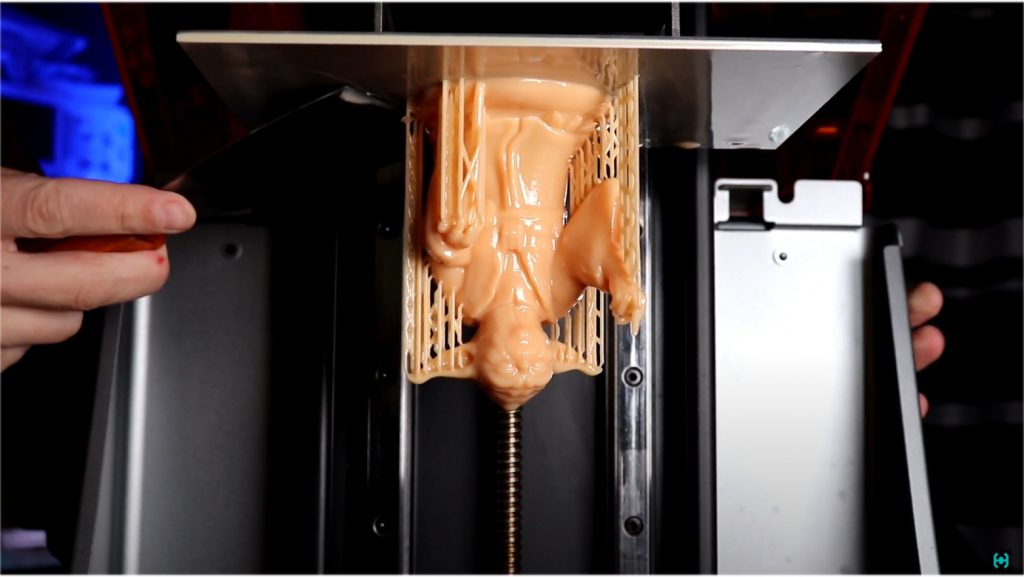
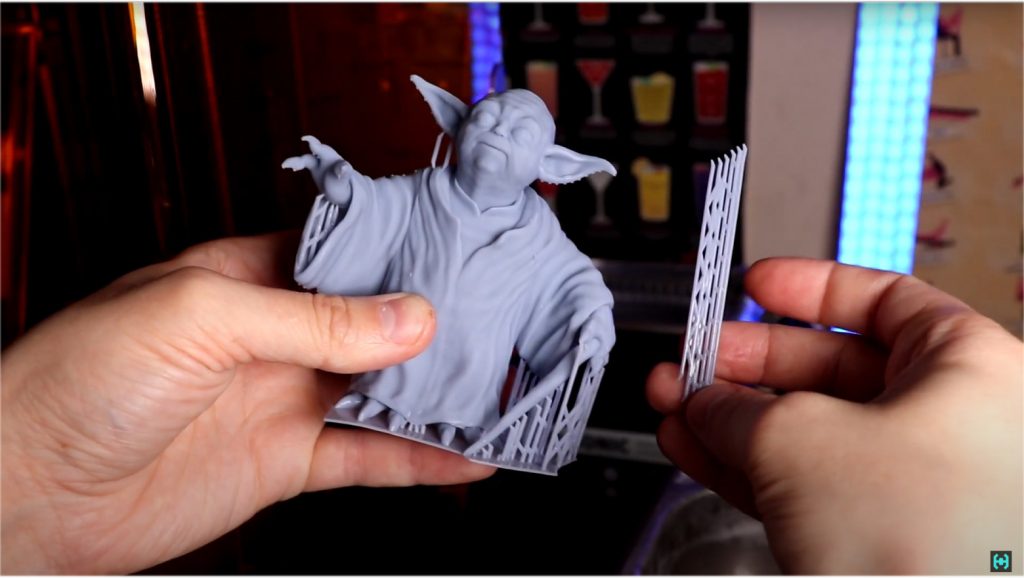
A little about the Z -axis table . It is aluminum with a thin layer of anodizing for good adhesion. There is no need to be zealous with an iron spatula. One day, Master Yoda firmly entrenched himself in his positions and did not want to come off. I had to knock him out by force. Both metal and plastic flew to the sides. As a result, the appearance of the table has forever lost its original appearance. In order to separate the result of many hours of cultivation without consequences, I recommend removing the table from the printer and carefully peeling off all this beauty.
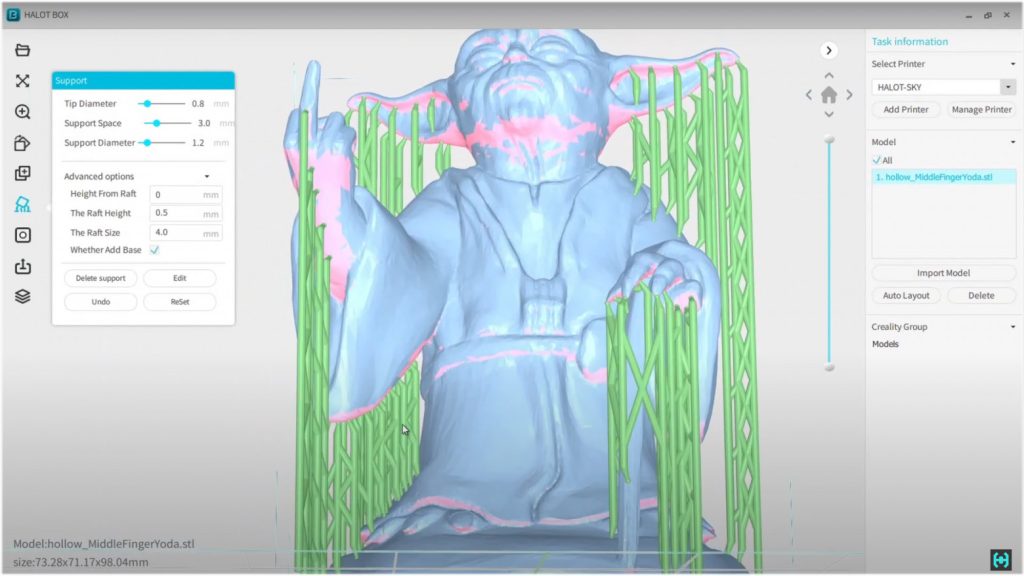
Halot Box program. It is a primitive slicing in which you can set the layer thickness starting from 10 microns, create hollow models and generate supports. The software is pretty fast. Support for those who encounter this type of printing for the first time is needed so that individual fragments of the model do not begin to grow in the air. Otherwise, the fingers will remain in the resin due to the small area of contact with the table.
Supports are installed on all protruding elements. Here we are not in a hurry and carefully study the layers of the model from all possible angles, the polymer resin is quite expensive, and screwing up the print is easy. I do not recommend automatic generation of supports to anyone, only manual. From practice, the machine does not understand where and which node of the model needs to be strengthened. All this comes with experience, even in the manual version it is impossible to foresee all the subtleties, because the starship at the stern began to exfoliate like an open book in the wind.
For hollow models, a drain hole is required to drain the polymer, a function in the program is called Drill. If you do not make a hole, the resin will be sealed inside the product. In this case, we take out a drill and perform drilling work, and then drain.
Now about Satan. I do not understand how this software got into the outside world. He constantly took off and sometimes had to repeat the same procedure several times. This applies to both younger versions and older ones. In technical support they said that my Windows is outdated, let’s put the top ten. Installed and saw the same thing. After a while, I updated my computer and everything worked on Ryzen 9.
Third-party programs like Lychee Slicer seem to be advanced, but the i5 processor constantly sent me to hell. The layer height could also not be set below 50 microns. CHITUBOX turned out to be perhaps the best slicing software that doesn’t freeze your computer, but it doesn’t have support for the Halot SKY printer.
As a result, I had to use my native slicer. By trial and error, we create a model of the green master and upload it to a USB flash drive. We insert the flash drive into the printer and start printing.
Forming supports with a native slicer does not require working with wire cutters and other household tools. They are wonderful to break by hand. What is called finalize then only with a file. This is the best scenario that can exist in this case. In the Lychee Slicer, the supports came off with the giblets of the model, and now it is impossible to restore the surface. In general, we pour more isopropanol into a jar and perform water procedures on it.
During filming, parasitic light appeared on the sleeve, we had to depressurize the light dome and shoot the material in the rays of lighting equipment. Polymer printing requires as little outside intervention as possible. This sample was a mystery at one time, since the printing of the model was carried out at night under the sweet snoring of the neighbors behind the wall. Nothing could contribute to the formation of lines during the printing process. But as it was said at the beginning of the film, the mount on the mirror reflecting the flow of light, which resonated in time with the stepper motor, is to blame.
As for defects in photopolymer printing, you can shoot a separate film, since anything can affect the final result. I even had to carry out a whole research work with the study of the influence of external factors. It consisted in the fact that at a certain time a light source with different wavelengths, a fan or a vibration motor was turned on or off, which creates seismic external vibrations on the table. Each of the above equipment in one way or another led to the formation of lines on the models.
From practice, it turned out that sunlight has a positive effect on tanning and negatively on the state of the resin. If you print for several days in a row in clear weather, then the photopolymer becomes controversial, no matter how you look at it, and no ultraviolet protective cap can save you from this. Therefore, all further work was carried out surrounded by garden structures in the form of what was at hand. Less light, more benefit.
Processing models after printing. After removing all the supports on many elements, traces remain in the form of acne. They are removed with a nail file and other abrasive accessories with different grain sizes to a satisfying final result. If the support is torn out with giblets for one reason or another, you can restore the crater using the same resin, fill the hole with it and fix it with an ultraviolet flashlight. Next comes the machining. At the stage of post-processing of the model, there is no need to rush.
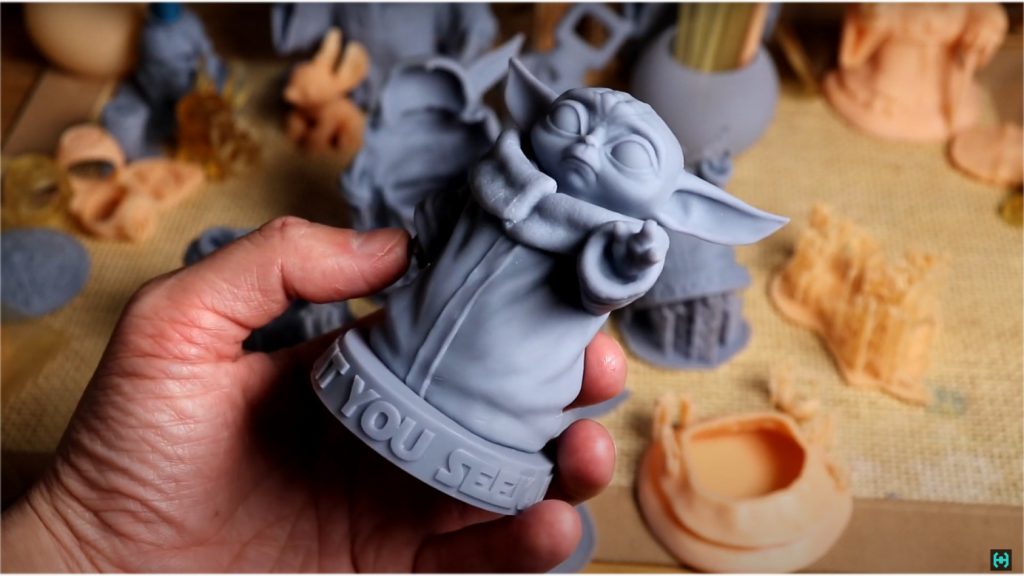
I believe many of you have watched the series “The Mandalorian” and the book “Boba Fett”. There was a small iodine, and so, he pissed me off. The model looks simple, but printing it turned out to be another task. At the beginning, it partially broke away from the supports. In the program, as usual, I forgot to set the hollowness and as a result, 200 grams of polymer went to the wind. Then Grog’s hands came off due to the insufficient thickness of the supports. Marriage was just the sea. Fortunately, an experiment is an experiment, it allows us to understand the principles and laws of the world around us.
The model turned out to be complicated in terms of hinged elements both inside and outside, which required internal filling with supports. Halot Box does not have such a function, but Lychee Slicer has, among other things, the ability to hang the computer. On understanding the orientation of an object in space when printing in a canopy with all of the above, a whole carriage of defects has accumulated. Expensive polymer is certainly a pity, but experience has never been given at a simple price. As a result, this baby was born.
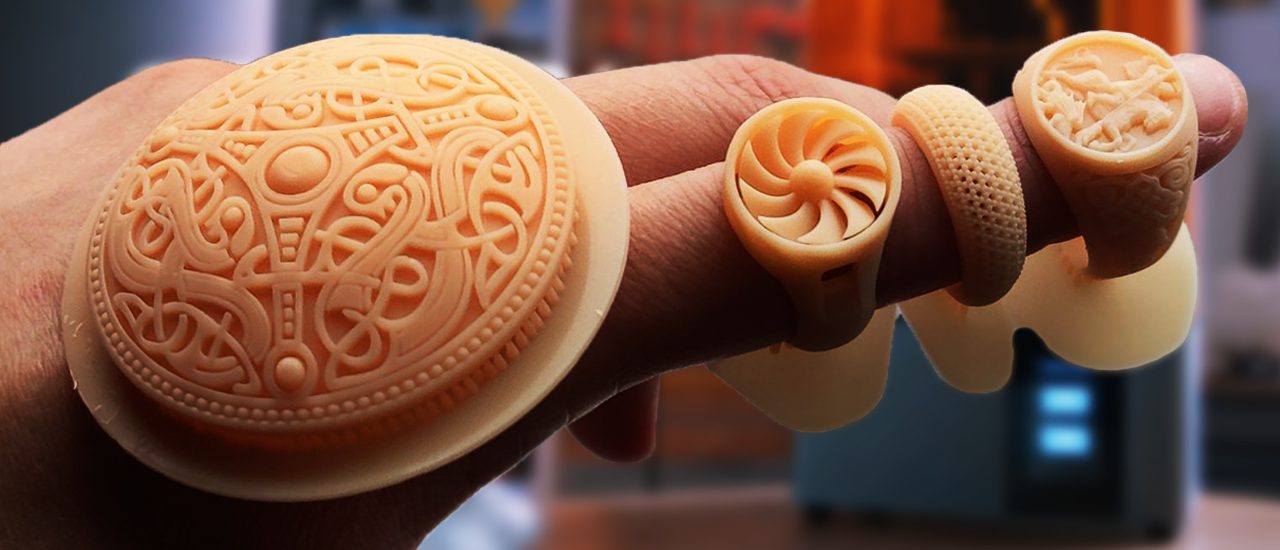
Comparison of the print quality of jewelry with different layer heights and with different photopolymers. Let’s look through a microscope at the relief of the ring with the image of George the Victorious planting a snake on a bottle. Here we see three layer heights, 10, 30 and 50 microns. The lower the height, the higher the quality, the longer the print time. When magnified, it is clearly seen how the steps on the spherical element disappear. At 10 microns, the transitions are almost invisible, they seem to have merged and formed a smooth single surface. From this it is clear that when printing such models it is better to sacrifice time to increase the maximum detail.
Growing jewelry from liquid turned out to be an interesting activity, as each seal was subjected to many hours of study of various surface details. Sometimes the result looked quite predictable, and sometimes it was a stupor, especially if you set the light correctly and look at one point.
Now about the gray photopolymer from Anycubic. I don’t know how things are with those who constantly print to them, but I have vague doubts about its quality. At the beginning, I assumed that the bank was overdue here. But no, fresh until 2023. Then he suggested that the whole point was a violation of the technology for fixing the resin with ultraviolet light. All of the gray polymer products from Anycubic had an enormous amount of shrinkage. I had to print another model to evenly illuminate it with ultraviolet light, but fortunately this was not necessary. Taking out the ring directly from the printer, it turned out to be much smaller than those rings that were printed with another photopolymer. That’s it.

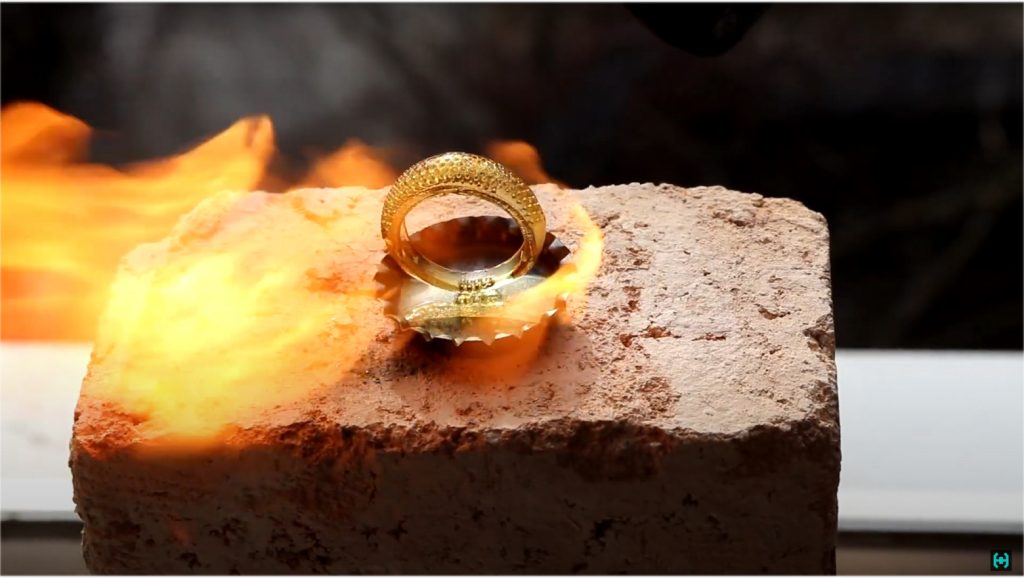
And finally, a little about the burned-out photopolymer resin Gorky Liqid Castable LCD. Some probably think what does burnt out mean? This means that at a certain temperature it literally burns out. In this case, the product evaporates without a trace and leaves no residue behind. While I was filming the material, I did not notice how the burning polymer dripped onto the window sill and burned through the coating. Damn, my wife will kill me)
Until she sees, we continue fire hazardous work with ordinary resin, let’s see what remains after it. You can clearly see how much soot is formed during the combustion of a conventional photopolymer; this option is not suitable for jewelry. Who is not in the subject, there the printed model is poured with molding mass, then the flask goes through a many-hour cycle of calcination and resin burning, and then liquid metal is poured into the formed cavity. It turns out a complete copy of the object from resin in metal. If the model burns out and leaves traces behind, you can forget about metal casting.
The color of the photopolymer in the line of this manufacturer is one – transparent yellow. The price is two and a half times cheaper than the green swamp shown at the beginning of the post. As for the print settings. The first attempts to grow something were carried out on the standard settings of the previous resin with an exposure time of 2 seconds. But nothing good came of it. I had to experiment with matrices. They print quickly and immediately give an idea which control buttons to press on the printer. In general, you need to shine this resin for a long time, 10 seconds for a 50 micron layer and 6.5 seconds for a 10/30 micron layer. By the way, more than 10 seconds of exposure on the printer can not be set, the limit.
For reference. Throughout this post, a lot of both necessary and unnecessary items in everyday life were printed. The field for creativity here has no boundaries, especially if you know how to model on a computer. For the birth of all the items, it took a bunch of experiments, to understand the principles of operation of different programs, to figure out the printer settings and transfer a ton of toilet paper. Each case has its own subtleties and nuances, the study of which requires time, patience and resources. The latter has recently been extremely lacking and all hope is only for sponsors. Further it will be more interesting. Burnout casting, induction half-bridge foundry, ionistor contact welding, various dosimeters. There is a whole scientific work on Tesla coils with meter lightning. In general, while alive, you will have something to surprise.